
Propagation
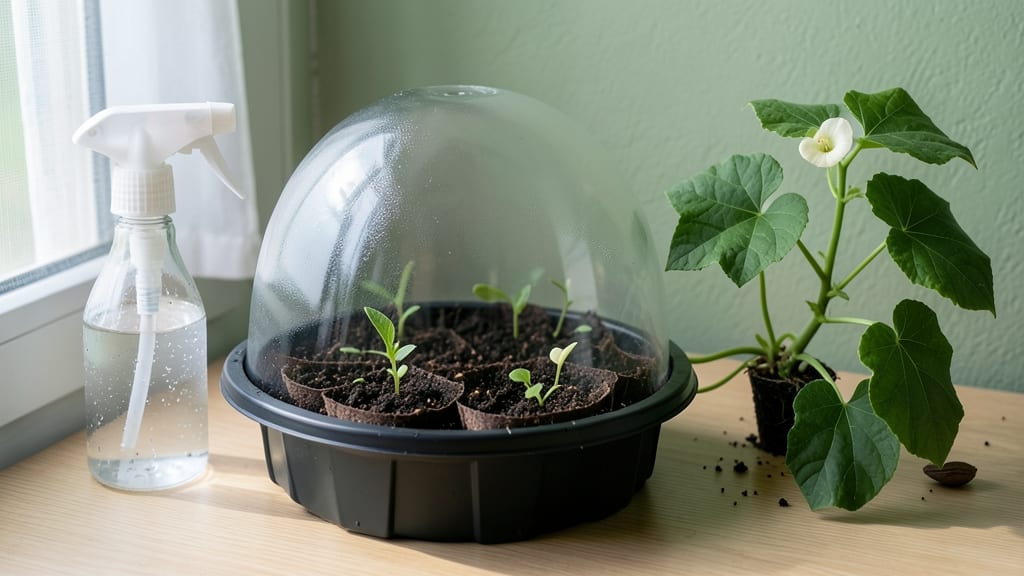
Germinating moonflower seeds 🌙 fast is all about warmth—because these beauties need consistent heat to break their dormancy and sprout.
Picture this: you’ve sown your seeds in late spring, only to stare at them for weeks, wondering why nothing’s happening. The truth? Moonflowers (Ipomoea alba) are picky about temperature, and without the right tricks, they’ll just sit there, stubborn as ever.
But here’s the good news: with the right 7-day heat hacks, you can turn those hard little seeds into thriving seedlings in just a week. No more waiting months for a single sprout to peek through.
Below, I’ll walk you through the science of warmth, the tools you can use (even if you don’t have a heat mat), and the common mistakes that kill germination before it starts.
The science of moonflower seed germination: why warmth speeds up sprouting
Moonflower (Ipomoea alba) seeds are notorious for their slow germination—unless you understand their biological triggers. These seeds rely on warmth to break dormancy, with 65–85°F soil temperatures being the sweet spot for activation.
Without proper heat, enzymes inside the seed remain inactive, leaving your seeds stuck in a waiting game that can last weeks or never happen at all.
Think of germination like a chemical reaction: warmth provides the energy, while moisture delivers the reactants. Moonflower seeds need both to dissolve their protective seed coat and kickstart root growth.
The challenge? Many gardeners overlook how consistent warmth accelerates this process—sometimes cutting germination time from 3+ weeks to just 7 days.
Here’s the science: Moonflower seeds often enter secondary dormancy, a survival mechanism that prevents sprouting until conditions are ideal. This dormancy is broken when the seed absorbs water and the surrounding soil reaches at least 70°F.
Below this threshold, the seed’s metabolic processes stall, and even with moisture, nothing happens.
Before planting, test seed viability by soaking 10 seeds in warm water for 24 hours. If 50% or more swell and sink, they’re viable. If fewer than half react, your seeds may need scarification (lightly sanding the seed coat) or a longer warm soak.
This quick test saves time and frustration later.
| Germination Factor | Optimal Range | Effect on Sprouting |
|---|---|---|
| Soil Temperature | 65–85°F | Speeds up enzyme activation by 3x |
| Moisture Level | Consistently damp (not soggy) | Prevents seed desiccation and rot |
| Seed Coat Integrity | Lightly scarified or intact | Intact coats delay germination by 10–14 days |
| Oxygen Availability | Well-draining medium | Anaerobic conditions kill sprouts in 48 hours |
| Light Exposure | Darkness (until sprouts emerge) | Light inhibits early root growth |
The moisture + heat combo is non-negotiable. Imagine a seed as a tiny factory: warmth turns on the machinery, while moisture delivers the raw materials. For moonflowers, bottom-watering (placing pots in trays of water) maintains ideal moisture without drowning seeds.
Avoid overhead watering—it can wash seeds out of the soil or create anaerobic pockets where roots suffocate.
Pro tip: Use a seedling heat mat set to 75°F for 12 hours daily. These mats mimic the forest floor conditions moonflowers evolved under, where decaying leaves and sunlight created naturally warm microclimates.
Even a DIY setup with a heated towel draped over your seed tray can raise temperatures by 10–15°F, cutting germination time in half.
If your seeds still refuse to sprout after 2 weeks, suspect dormancy or poor viability. Try stratification: place seeds in a damp paper towel, seal them in a plastic bag, and refrigerate for 7–10 days.
This mimics winter conditions and tricks the seed into thinking spring has arrived. Once removed, warmth will finally activate the germination process.
Remember: consistency is key. Fluctuating temperatures confuse the seed, while stable warmth signals safety. Once your moonflower sprouts appear—thin, green, and eager—transition them to indirect light and reduce bottom-watering to prevent leggy growth.
With the right warmth, you’ll go from seed to sprout in less than a week instead of months.
🌱
7 Proven warmth tricks to germinate moonflower seeds in 7 days
Moonflower seeds (Ipomoea alba) need consistent warmth—between 65–85°F—to break dormancy and sprout quickly. Without the right heat, they can take weeks or fail entirely. The good news?
You don’t need fancy equipment. With these 7 heat hacks, you’ll see sprouts in just 7 days while avoiding common pitfalls like rot or uneven germination.
Start by prepping your seeds with microwave scarification—a 30-second zap in a damp paper towel softens the seed coat, mimicking natural weathering. Pair this with bottom-watering heat mats (or even a repurposed rice cooker) to maintain steady moisture and warmth.
These methods create the perfect germination cocktail: heat + hydration without overwatering.
🌱 7 Warmth Tricks for Moonflower Seeds
- Microwave Scarification: Zap seeds in a damp paper towel for 30 seconds to soften the shell. Place in a sealed bag overnight for hydration.
- Bottom-Watering Heat Mat: Use a seedling heat mat (or a repurposed rice cooker pad) under your tray. Keep soil at 75–80°F for 24/7 warmth.
- DIY Greenhouse: Cover seeds with clear plastic wrap or a glass jar lid to trap humidity. Place near a sunny window or under a grow light.
- Rice Cooker Hack: Fill a rice cooker insert with moist sphagnum moss and place seeds on top. Set to warm mode (not cook) for 24-hour warmth.
- Hot Water Soak: Submerge seeds in 120°F water for 10 minutes to simulate natural rain. Drain and plant immediately in warm soil.
- Insulated Seedling Box: Line a Styrofoam cooler with damp paper towels, add seeds, and seal with plastic. Place near a heat vent for passive warmth.
- Sunlight Trap: Bury a black plastic bag filled with warm water near your seed tray. The bag absorbs heat and radiates it to the soil below.
For best results, combine two methods, like scarifying seeds and using a heat mat. Place your setup in a bright, warm spot (like a south-facing windowsill) and check daily for sprouts. Once you see green hooks (the first leaves), reduce heat slightly to 70°F to prevent leggy growth.
If your kitchen lacks a heat mat, a repurposed rice cooker works surprisingly well. Just fill the insert with sphagnum moss (not water) and place seeds on top.
The gentle warmth mimics a tropical microclimate—perfect for moonflowers. Remember: consistency is key. Fluctuating temps delay germination, so avoid drafty spots or cold windowsills.
After 7 days, your moonflower seeds should sprout. Thin seedlings to 12 inches apart and transplant outdoors only after nighttime temps stay above 55°F. With these tricks, you’ll bypass the 3–4 week wait most gardeners face and enjoy night-blooming magic sooner.
Got stubborn seeds? Try stratification: mix seeds with damp sand and refrigerate for 2 weeks before warming. This mimics seasonal changes and often breaks dormancy for tough batches. 🌙